What is the WordPress post editor?
Most WordPress users spend a lot of time with the post editor. It’s the part of the add a post screen which lets you add, edit and format your post or page content.
There are two tabs on the post editor – Visual and Text.
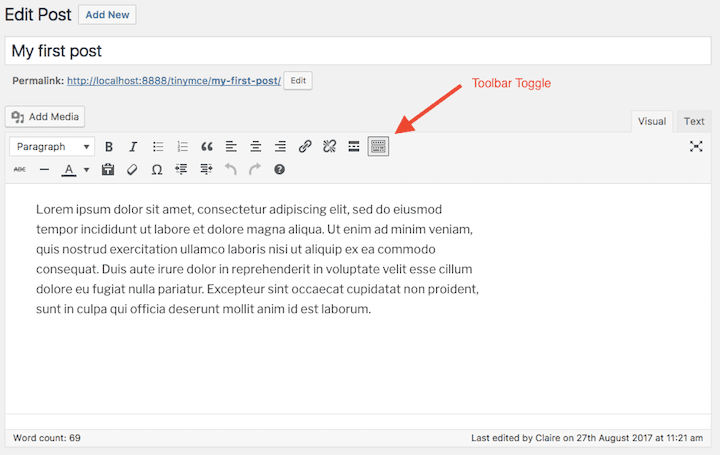
Visual view shows the TinyMCE editor. TinyMCE is a full featured WYSIWYG visual editor for editing HTML. The visual editor is similar to Microsoft Word. A second row of buttons is visible when you click the Toolbar Toggle button.
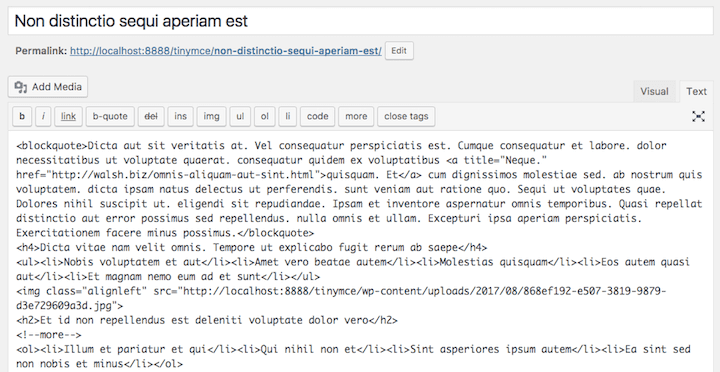
Text view shows the HTML code view for the page. There’s a more limited range of buttons with code names and some of them don’t appear at all. This is the view more often used by coders.
What do the WordPress post editor buttons do?
This is a list of the buttons in the basic editor and their functions.
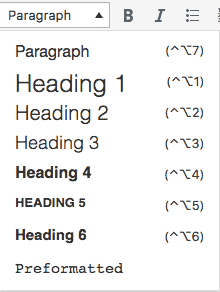
- Paragraph dropdown: choose between the paragraph style (the default) and heading styles.
Another choice is
preformatted text which uses a monospaced font and appears on its own line.
- B button (Bold): make the following text or selected text bold.
- I button (Italic): italicise the selected text or following text.
- Bulleted list: creates an unordered list of bullets.
- Numbered list: creates a numbered bullet list.
- Quote button (Blockquote): used to add a quotation from another source.
- Left align: left align text; this is the default.
- Centre align: centre align text.
- Right align: right align text.
- Insert link: insert or edit a hyperlink.
- Unlink: remove a hyperlink.
- Insert Read More tag: Creates an excerpt from the text up until the More tag. See my post on Excerpts.
- Toolbar Toggle: opens a second row of buttons.
- Strikethrough: applies a
strikethrougheffect. - Horizontal line: adds a horizontal line into the content.
- A button (Text colour): change the text colour. Watch you don’t misuse this!
- Paste as text: when toggled on, adds all text as plain text with no formatting. Sometimes useful when copying and pasting from another source.
- Eraser button: remove all formatting from selected text e.g. bold, italic, headings.
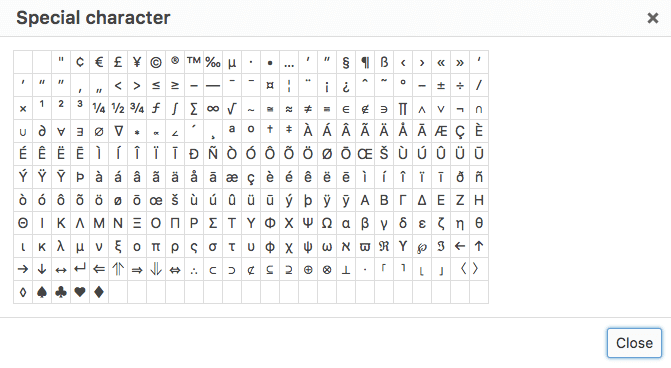
- Omega button (special characters): lets you add special characters e.g. £, ½, é.
- Decrease indent: indent the text less.
- Increase indent: indent the text more.
- Left arrow (Undo): go back one action.
- Right arrow (Redo): redo an action that was undone.
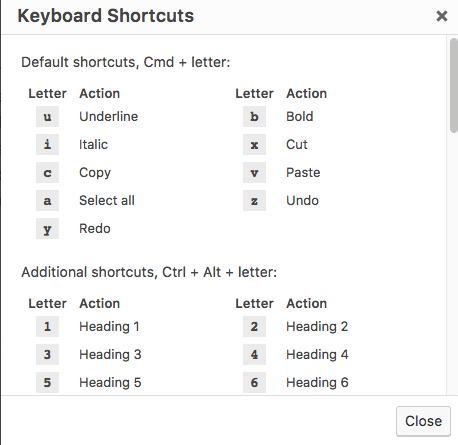
- Question mark (Keyboard shortcuts): Open the list of keyboard shortcuts. Scroll to read the full list.
You can apply multiple styles to some text selections, but not all. For example, you can set text as a heading and centre it.
The post editor in different themes
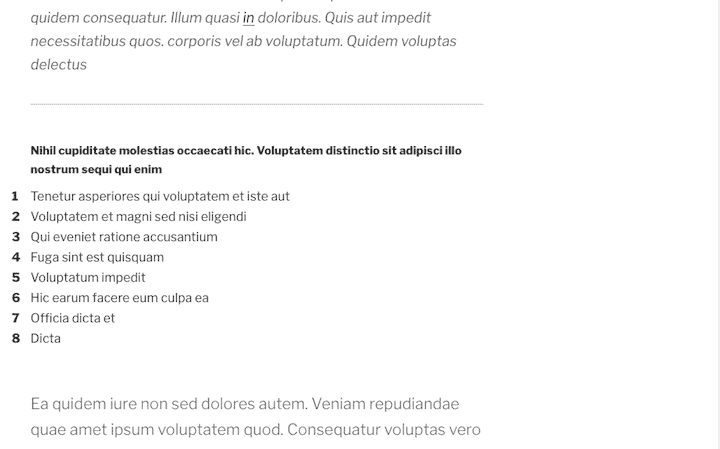
If you’ve ever switched theme you might notice a difference in the post editor formatting of your text. Here’s an example:
Twenty Seventeen theme
Twenty Sixteen theme
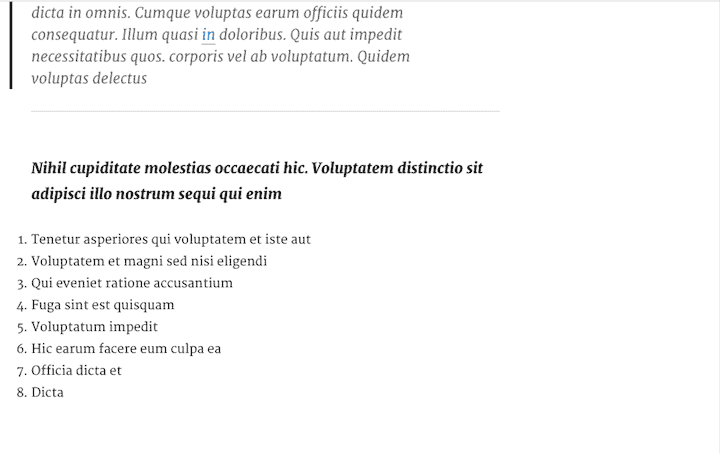
Why the difference? Each theme has a different style for the post editor in a file called editor-style.css This applies the same style to the content in the post editor as would appear to the site visitor.
Twenty Seventeen uses the Libre Franklin font with Helvetica Neue as a fallback font. Twenty Sixteen uses Merriweather font with Georgia as a fallback.
Custom editor buttons
Some plugins add custom buttons to the visual editor.
For example, the Better Click to Tweet plugin adds a button to add a shortcode. This lets you a tweetable quote to the post.
Jetpack plugin can add a spellchecker button to proofread your writing.
Adding extra TinyMCE editor options
TinyMCE Advanced
TinyMCE Advanced plugin adds options to the WordPress post editor which are not present in the default implementation.
This is how it changes the editor after installation without any configuration:

What’s new?
You’ll probably have noticed a new menu and some new dropdowns and buttons.
The Editor menu is the toolbar at the top with File, Edit, Insert etc. at the top. Most of these options you can get via other buttons or other dropdowns.
The Table option and button are used to add a data table quickly.
Font family is a dropdown list of your current editor font plus system fonts. Since using a mix of fonts can look bad, I think you are better sticking with your theme fonts.
Font sizes (the 12pt dropdown) is a useful option for many, but use it sparingly.
Extra styles for bulleted and numbered lists via the dropdown arrows.
Extra buttons and options
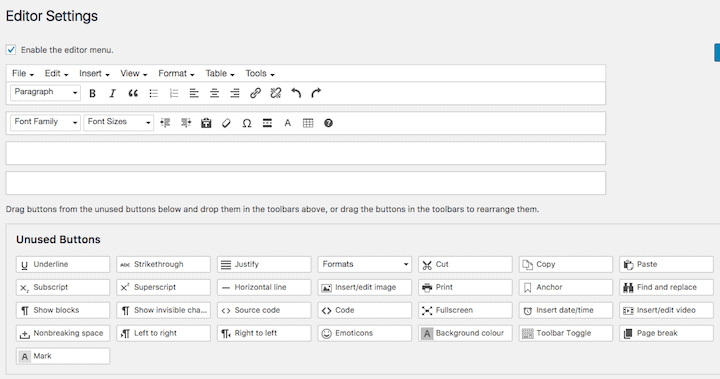
Using Settings > TinyMCE Advanced you can customize the post editor to your requirements. Simply drag and drop the buttons that you want to use where you want to use them.

Of the unused buttons here are the ones I think are useful and not useful:
Useful buttons
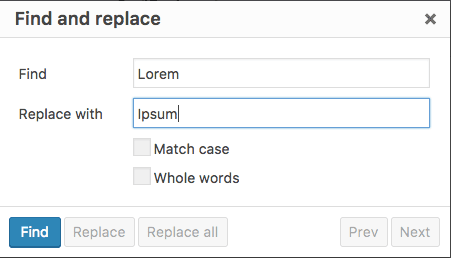
- Find and Replace: Very useful if you’re changing multiple instances of a word/phrase in a document. I say use it.
Find and replace dialog box - Cut, Copy, Paste – I usually use the keyboard shortcuts but the buttons are handy to have as well.
- Toolbar Toggle: You will see two lines of buttons by default – more if you add extra ones. This button toggles on and off the extra lines.
- Nonbreaking space: Use if you want to enter some text with a space included which you don’t want to show over two lines e.g. 10 000.
Not useful buttons
- Underline: I’m not a fan of underlining ordinary text as it could be mistaken for a link.
- Justify: Justified text can be harder for some users to read, so I don’t use it.
- Insert/edit image: Don’t use this. You should use the Add Media button.
- Print: Will you be printing the editor screen? I think not. Don’t bother.
- Insert/edit video: WordPress automatically embeds videos, so you don’t need this.
- Background colour: Enable at your peril! The end result doesn’t normally look good.
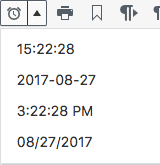
- Insert date/time: A dropdown with different date/time formats. I can’t see a good use for this one unless you like the formats.
Insert Date/Time formats - Show blocks/invisible characters: Not helpful.
- Emoticons: Shows the old style Smileys which are rendered as the more modern emoji. Read more on WordPress and emoji.
- Fullscreen: Toggle the post editor and controls fullscreen. This button is in the post editor already underneath the Text tab.
- Formats: A dropdown list of styles which you can mostly generate from other buttons.
- Mark: I don’t know what this does – it didn’t show up for me!
Up to you
- Strikethrough: It’s in the post editor normally, so if you use it feel free to add it back in.
- Horizontal line: Also in the default editor – add it back if you need it.
- Subscript/Superscript: If you work in a scientific field, these might come in handy.
- Code/Source code: Only for web developers. 😉
- Left to right/Right to left: If you write in a language which is read right to left e.g Arabic, use the Right to Left button to format it appropriately.
- Page break: Possibly useful if you write a long tutorial post to split it into pages.
Don’t go crazy and enable everything! The post editor will look very cluttered.
Taking away buttons or dropdowns that you don’t use is just as important as adding ones in.
I prefer the Font size option of setting the values used to pixels (used in web design) rather than points (used in print design).
You can also export the editor layout you like and import it into another WordPress site with the TinyMCE Advanced plugin enabled.
Creating your own custom style buttons
Visual Editor Custom Buttons allows you to add custom buttons to the WordPress post editor where you define the style yourself.
Add a citation button
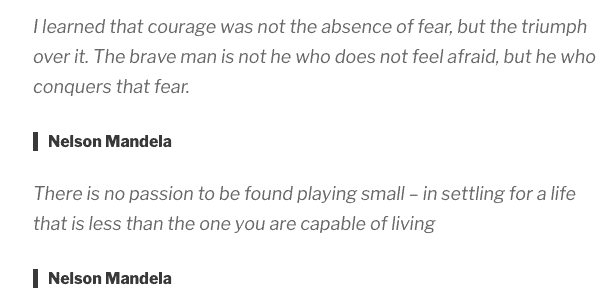
For example, there is a <blockquote> button for quotes but no <cite> button for citations. Let’s add one.
Here are the settings you need (Visual Editor Custom Buttons > Add new).
Button content: Wrap selection
Before: <cite>
After: </cite>
Button icon: Choose from the list – I picked Quote bubble.
Any custom styles you apply in the Visual Editor Content Styling area will show in the editor only. You’ll need to add the same styles to your stylesheet to get them to show on your post or page.
These are the styles I used:
cite {
font-weight: bold;
font-style: normal;
padding-left: 10px;
border-left: 5px solid #333;
}
The style on the editor looks the same as the style on the page.
Add buttons for your brand colours
We’ve seen that the Text colour button can be used to add colours to text selections.
While it’s possible to define custom styles in the Text colour button, they are not saved for reuse.
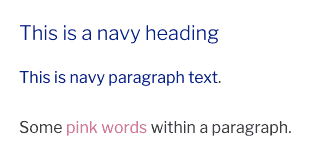
Here’s how to add some buttons for particular brand colours – navy and pink. This colour scheme comes from Coolors.co.
Navy style:
Button content: Wrap selection
Before: <span style="color: #000080;">
After: </span>
Button icon: Felt tip
Pink style:
Button content: Wrap selection
Before: <span style="color: #DE5D83;">
After: </span>
Button icon: Pen
Because we use an inline style, we don’t need to define it in the stylesheet as well. As mentioned, this is best suited to applying the colour to a few words – not whole paragraphs or headings, unless it’s a one-time use.
Add a screen reader text button
Screen reader text is a useful accessibility feature for some users with a visual impairment.
Consider the following table:
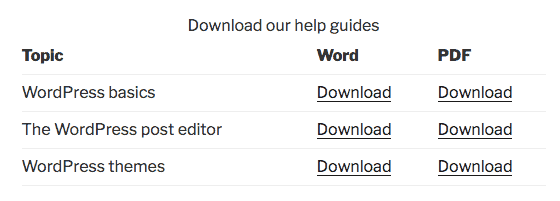
To a screen reader user, all the download links in this table will be read out as “Download”. There’s no distinction between them.
But if we could add the name of the guide and the format, it would be a lot more useful – but overkill for a sighted user.
The answer is to provide that information in a hidden way so that only screen reader users “see” it.
Here’s how to add a button for a screen reader text style.
Screen reader text style
Button content: Wrap selection
Before: <span class="screen-reader-text">
After: </span>
Button icon: Eye
Visual Editor Content Styling:
.screen-reader-text {

color: #b3b3b3;

}
I’ve given the screen reader text in the editor a lighter grey colour to indicate that it’s there but won’t be shown to most users.
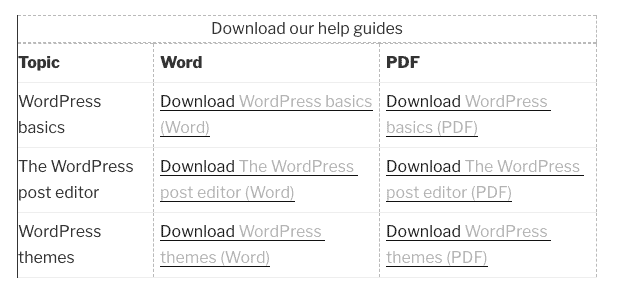
I didn’t need to add the.screen-reader-text class to my stylesheet as it’s already defined within Twenty Seventeen theme.
If your theme doesn’t have it, you can find the screen-reader-text CSS code here.
On the site, the table doesn’t look any different visually from the initial view, but it has that very useful info for screen reader users. Result!
What’s the future for the WordPress post editor?
With the release of WordPress 5.0, the visual editor is expected to undergo a major change with the introduction of Gutenberg. Gutenberg is a new WYSIWYG editor which creates content in blocks. I’ve reviewed an early version of Gutenberg here. It’s undergoing a sustained period of development and will have changed since that time.
We don’t yet know if that means the current editor is disappearing completely or will be available as a legacy option. That’s up to the WordPress core developers.
Over to you
- How easy do you find using the WordPress post editor?
- What tips do you have?

 Another choice is



It’s amazing how you can use an editing system for years and years and not even know what some of the toolbar buttons do! A very useful article, thanks, Claire!
Hi Claire,
You have explained it very succinctly. Thanks for sharing such a great article. It was very helping.
Thanks Emily, appreciated.